 Nicholas A. Danes, PhD
How I use Cryptomator to provide [more] private cloud storage with iCloud
Posted on
Introduction
Over the past year, I’ve been bouncing between several different cloud storage services and/or sync clients, each with their own trade-offs between convenience, privacy, and pricing. For context, I use cloud storage primarily for easy immediate access of important documents/files. It also acts as a pseudo-backup (I use Backblaze and local drives for true backups with snapshots) in case I can’t access files on one of my machines. My storage needs aren’t too high, hovering around 20-25 GB of true storage needs. However most providers don’t offer plans with this low of storage. For example, Dropbox currently charges $11.99/mo with 2 TB as their lowest tier personal plan, which is more than I need for cloud storage.
That said, here’s a list of such cloud storage and/or sync clients I’ve tried:
- Syncthing - Works great, but I like having the cloud as a ‘pseudo-backup’ for my files
- Dropbox - As mentioned above, it’s way too expensive. However, I still have this account for collaboration
- Google Drive - Cheap ($1.99/mo for 100 GB), but since I use my Google account for things like music collaboration and YouTube, I don’t want all my eggs in one basket in case my account is either randomly compromised or closed
- Microsoft Drive - Also cheap, but I’ve had pretty poor experiences with their client on MacOS with my work laptop.
- MEGA - Requires trusting their client-side encryption and kind of pricey for my use case (~$5.90/mo for 400 GB storage)
- NextCloud (Self-Hosted) - Worked decently when I tried it, but I don’t have a machine to dedicate to it, nor do I want to deal with uptime. Like Syncthing, I also don’t like not having a ‘pseudo-backup’ in the cloud via sync when hosting at home.
- NextCloud (paid through Cloudamo) - Pricey at ~$4/mo for 100 GB. I’ve also had random issues with sync conflicts and the servers randomly going down. In addition, Nextcloud has been clunky and slow and their web/iOS apps leave a lot to be desired, which I won’t go into here. Finally, Nextcloud provides an entire cloud ecosystem that I honestly don’t need at all.
In the original first draft of this blog post, I was planning to move to OneDrive using Cryptomator. However, in the midst of writing this post, I discovered that OneDrive will treat Cryptomator encrypted files as a false positive for ransomware . I learned this going through writing the tutorial below. Although users have commented saying their files actually didn’t get deleted, I don’t want to risk it now.
Regardless, if you choose to use a cloud provider that only provides server-side encryption, you’re essentially trusting the provider to: (1) actually properly encrypt the files and (2) not look at your files. Most cloud services don’t even honor (2) at all with their terms of service, so encrypting your files before uploading to the cloud (even with more privacy-respecting services such as Nextcloud) is essential.
Why Cryptomator?
The first step to choose software to provide client-side encryption. There are a variety of client-side encryption options out there and two main alternatives I considered compared to Cryptomator were Boxcryptor or Veracrypt.
Boxcryptor is similiar to Cryptomator, providing encryption of files before uploading to the cloud. However, the software is closed-source and their free tier is limited to two devices, so that was a no-go for me.
Veracrypt is a trusted and well-known open source encryption tool, but requires creating encrypted volumes, where updating the synced files requires resyncing the whole container. I also found Veracrypt not as user-friendly as Cryptomator.
The last option I considered was Cryptomator, an open-source client-side encryption tool designed to encrypt files for cloud services such as Dropbox, Google Drive, iCloud and OneDrive. The client also creates a encryped volume (they call it a “vault”) in your desired cloud provider’s sync folder, but files are individually encrypted, allowing for incremental syncing when files are changed. Additionally, Cryptomator’s mobile clients work extremely well and allow you to seamlessly access your encrypted vaults when needed on the go.
Next, I will briefly go over how to make a Cryptomator vault on macOS. This tutorial should be applicable for Windows/Linux and non-iCloud users.
A quick tutorial on how to use Cryptomator
Get Cryptomator
Cryptomator is available on Windows, MacOS and Linux. For Linux users, Cryptomator provides a link to a PPA for Ubuntu-based users, an AUR for Arch Users and a AppImage for others. There’s probably other third-party packagers as well. For this tutorial, I’m using MacOS with homebrew:
$ brew install cryptomator
Setup your first encrypted vault
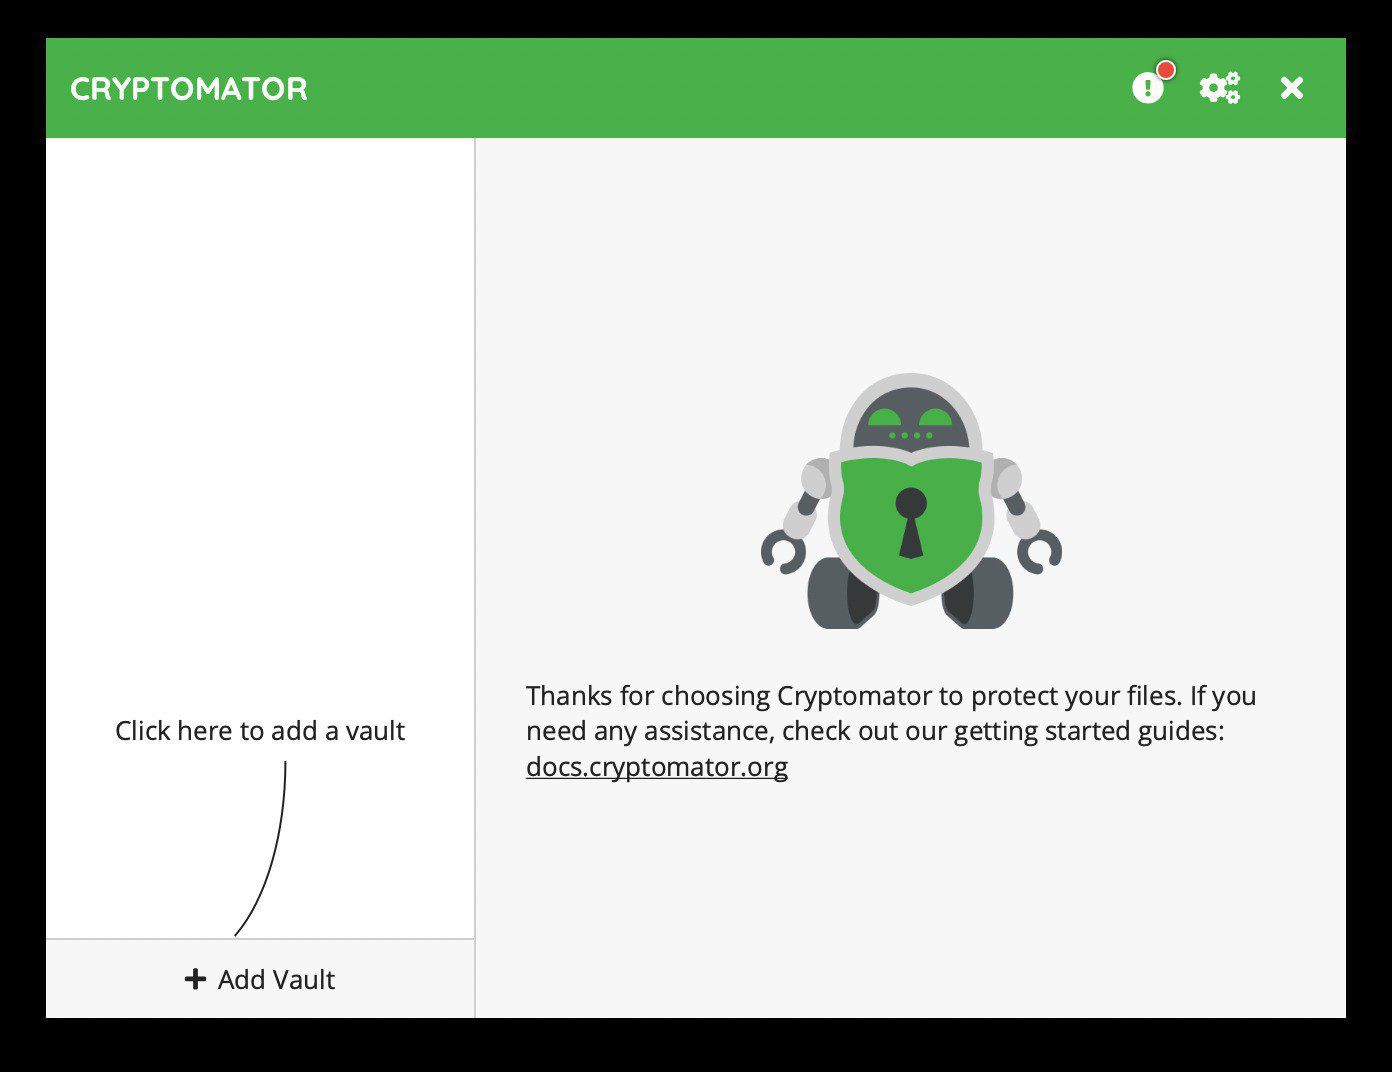
Open Cryptomator and you should see a window like this:
Click “Add Vault” and you should see this window pop-up:
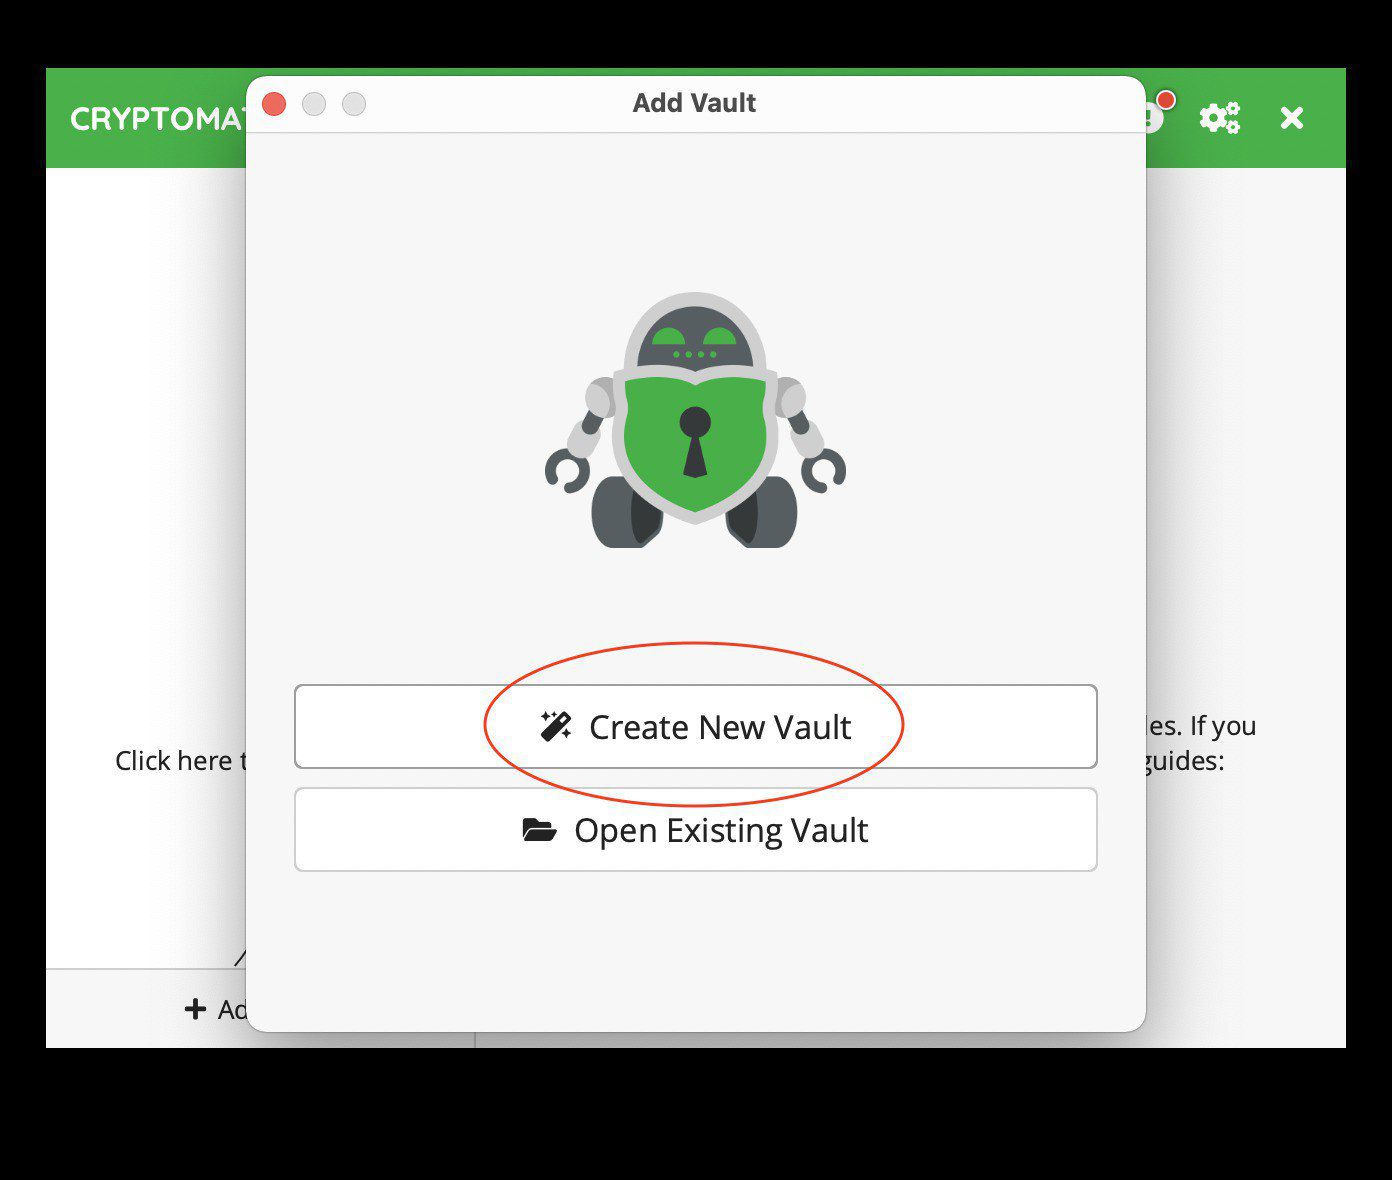
Next, click “Create New Vault.” The following window should pop-up:

Give a name for your vault. For this tutorial, I called it “Cryptomator_Docs.” Click “Next” and you should see:

If you’re on Windows or Linux, this box may look different. In my case, I’m going to use the default “iCloud Drive” choice and go to the next page.

Next you need to create a password for the vault. I personally generate one using my password manager Bitwarden and save the vault password there. I also recommend generating a recovery key and saving this somewhere other than your password manager by selecting “Yes please, better safe than sorry”.
WARNING: DO NOT LOSE THIS PASSWORD OR RECOVERY KEY. IF YOU DO, YOU WILL LOSE YOUR FILES.
Click “Create Vault” and this will go to the next page:
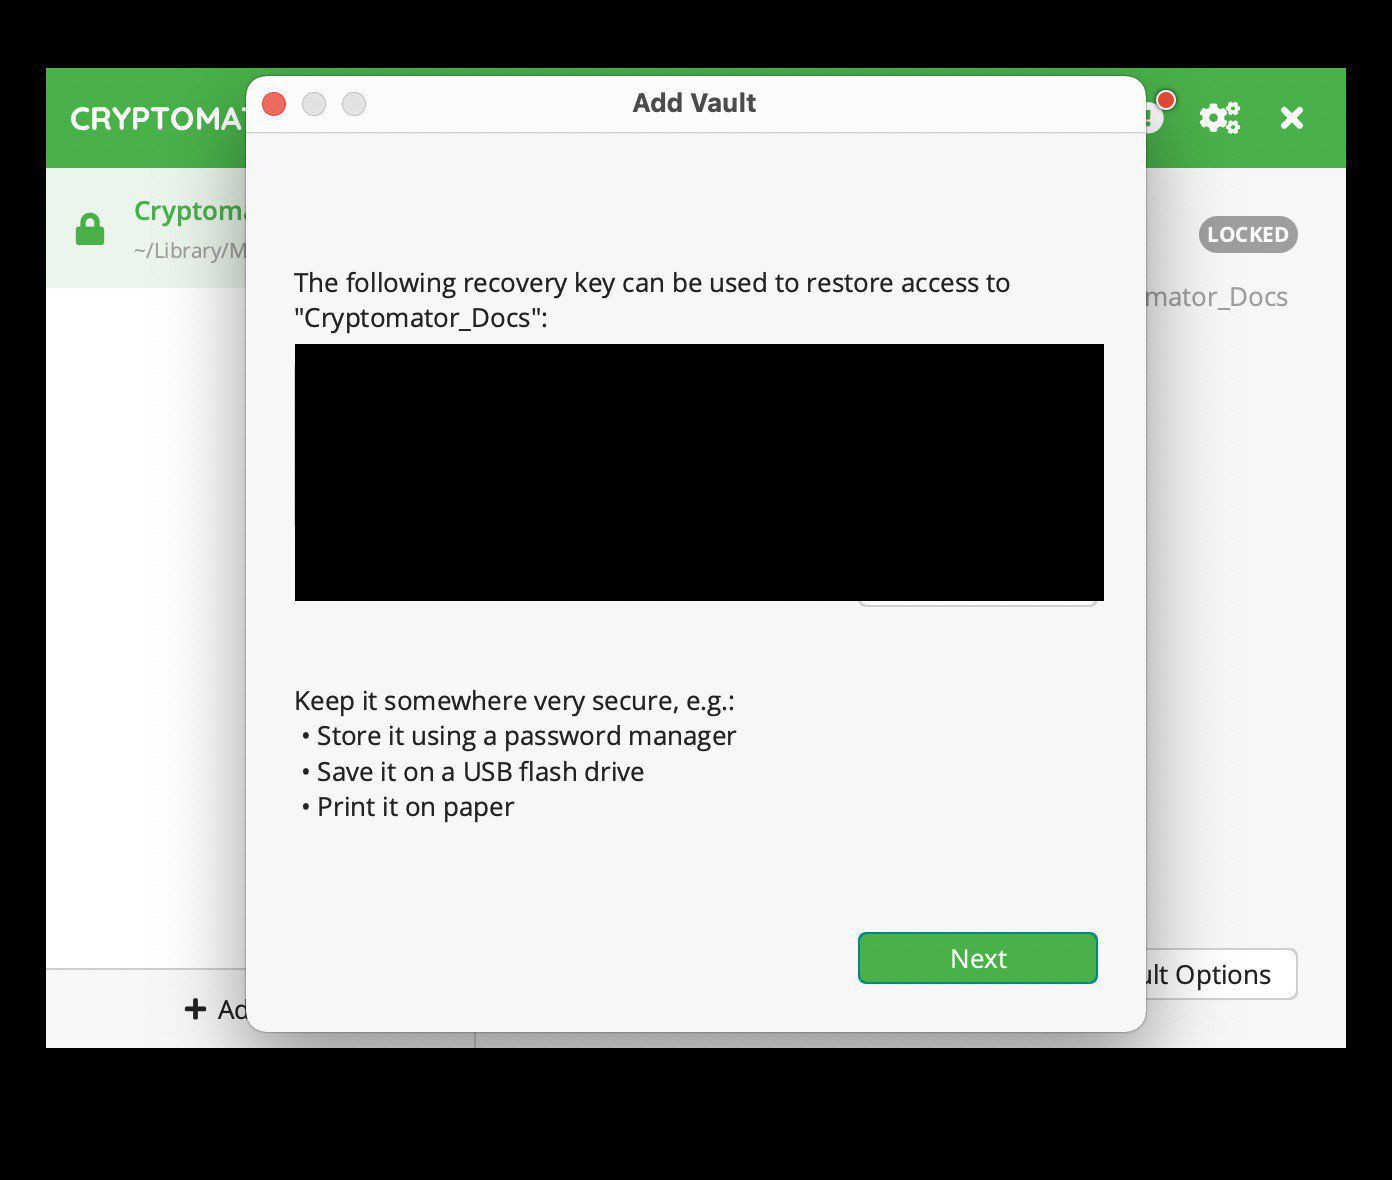
If you chose to make a recovery key, you should see a list of random words that acts as the recovery key. Save this somewhere! Click “Next”:
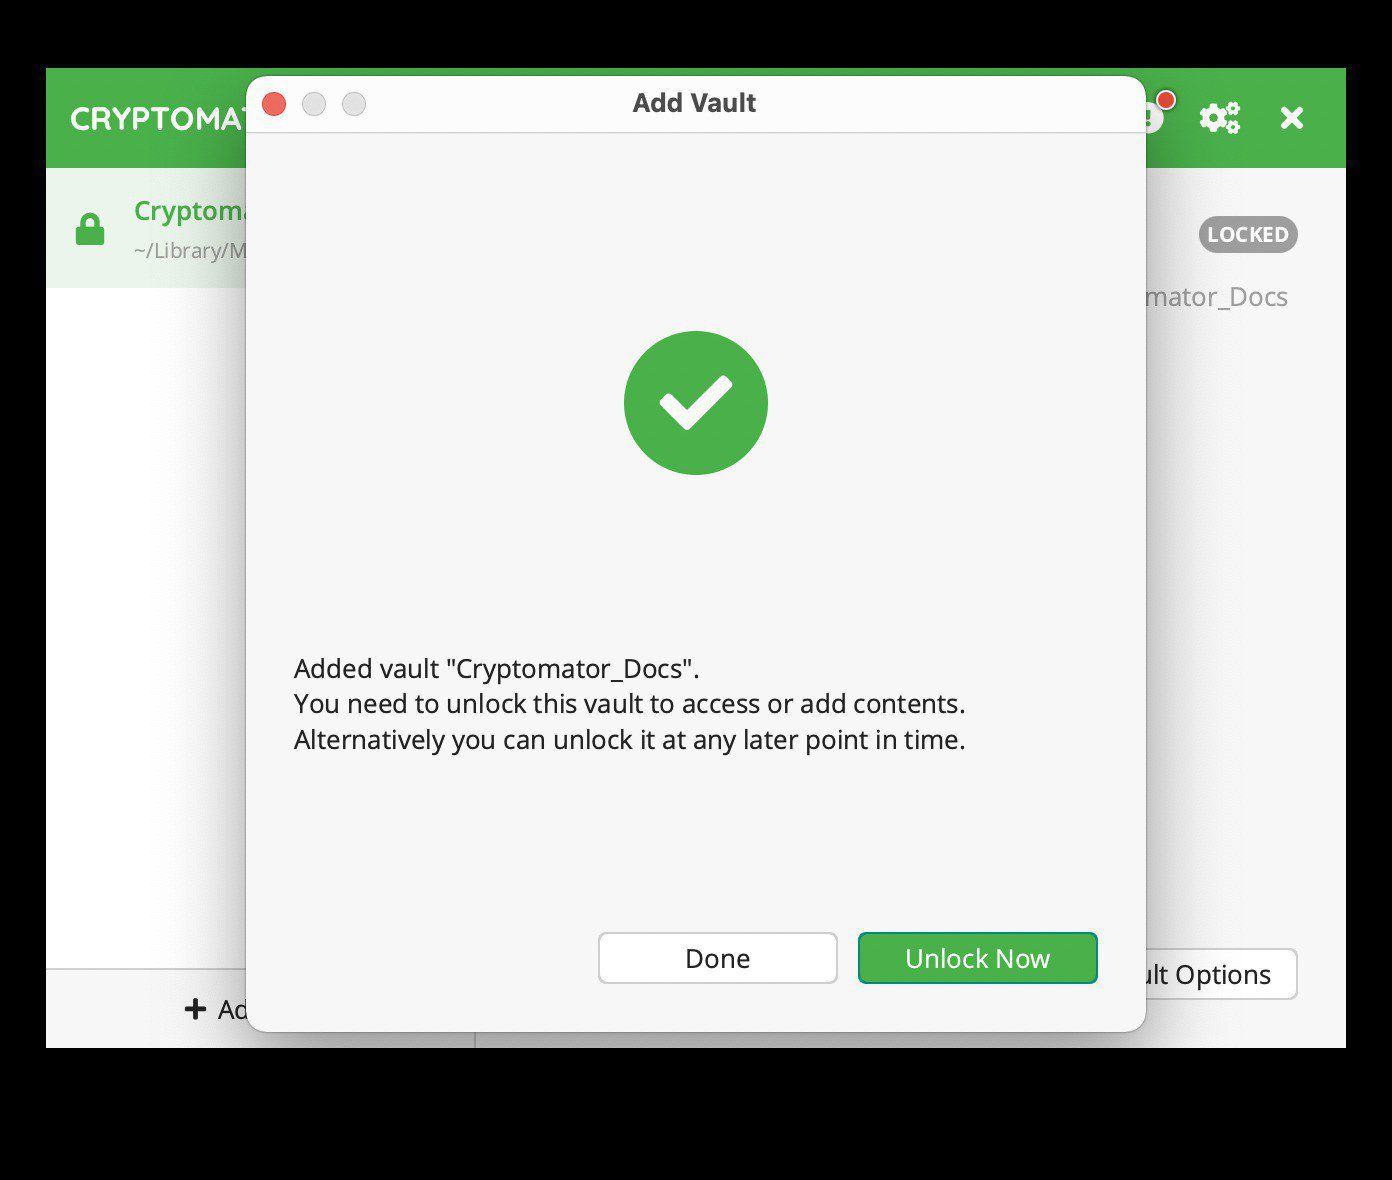
You should now have successfully created a vault to store files in. Click “Unlock Now” and you should see:
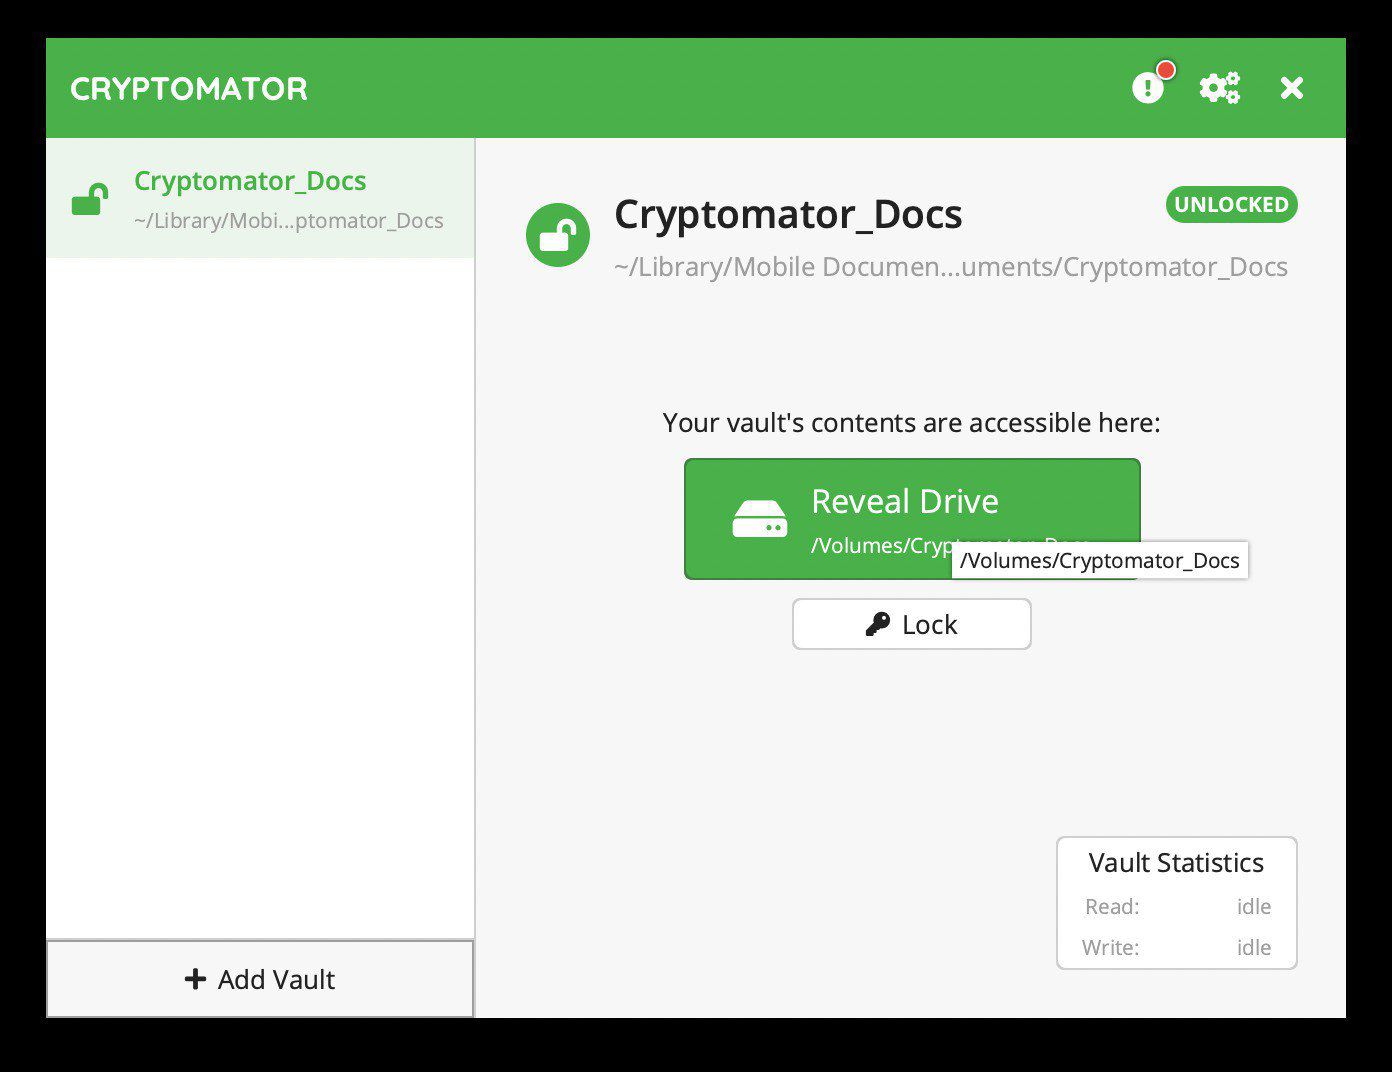
Upon unlocking, you should see an option to “Reveal Drive”. If you click that, it should open your file manager (Finder in my case).
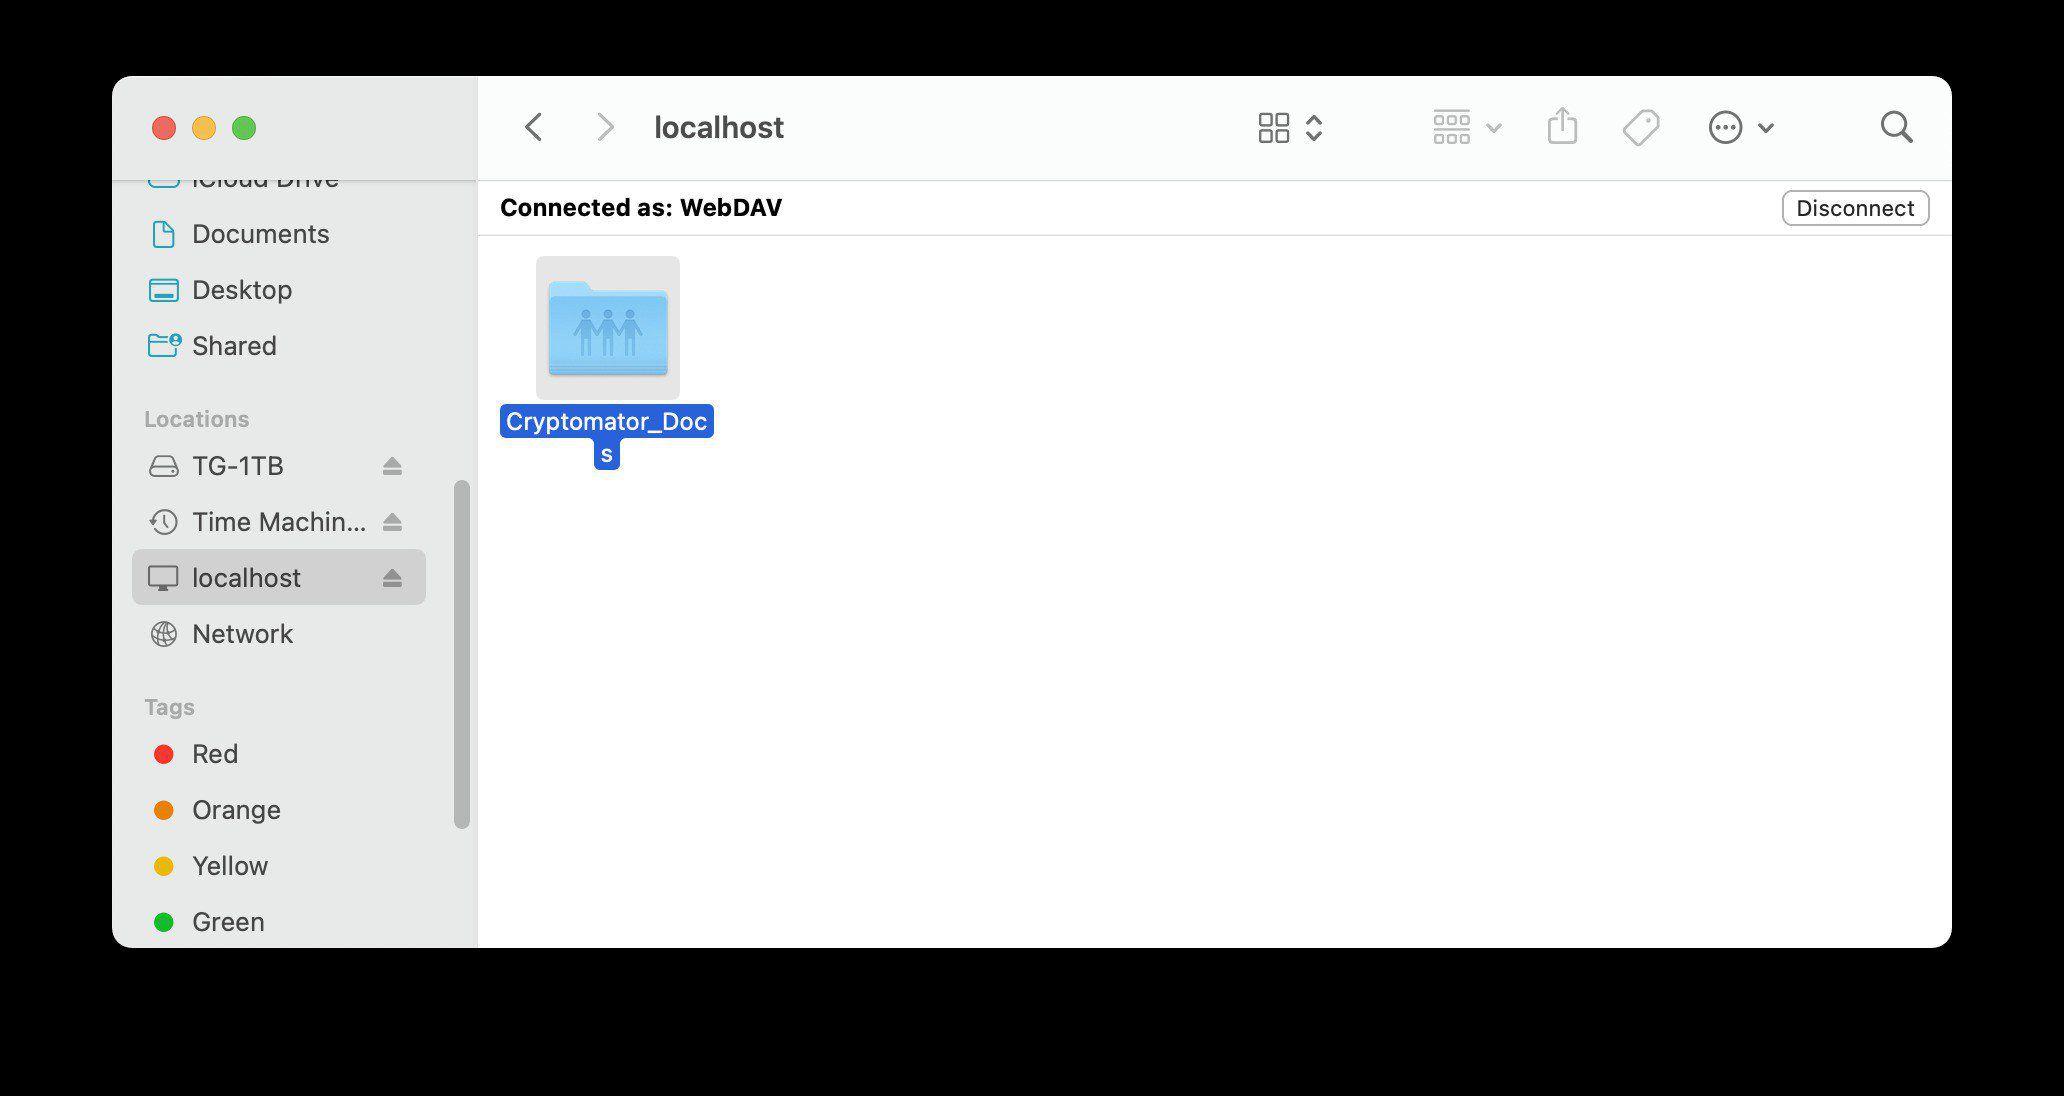
In macOS, a Cryptomator vault is simply a WebDAV drive mount that you can drag/drop files as normal. When you lock the vault and look at your cloud storage, you will see it just looks like a regular folder, but with all contents as encrypted nonsense.
Conclusions
I believe client-side encryption tools like Cryptomator are a wonderful way where you have your cake and eat it too. It allows you use commercial, Big Tech cloud providers with their large, cheap storage capacities, but still maintain privacy of your documents. Since it is crossplatform, and also has mobile clients for iOS and Android, you can access your files in a encrypted vault on most devices. The only downside is that there’s going to be some small inconvenience of having to unlock the vault whenever you want to access your files. But among a lot of the options, I find that this is a good balance between privacy and usability.